

Table of Contents
- What You'll Need: Essential Car Detailing Tools for Beginners
- Best Practices for Washing Your Car at Home
- How Long Does It Take to Detail a Car
- Interior Detailing: Vacuuming and Surface Cleaning
- Common Mistakes to Avoid When Detailing Your Car
- Budget vs. Professional-Grade Tools: What You Actually Need
- Maintenance and Storage of Your Detailing Supplies
- Frequently Asked Questions
Last Updated: August 31, 2026
What You'll Need: Essential Car Detailing Tools for Beginners
Starting a DIY car detailing routine doesn't require expensive equipment. Quality tools prevent common mistakes like swirl marks and water spots. At The Daily Drop by Ed Rivera, we're all about bringing you great products at prices that make sense. The key is understanding which items are truly necessary and which are nice-to-have upgrades for later.
Exterior Detailing Supplies
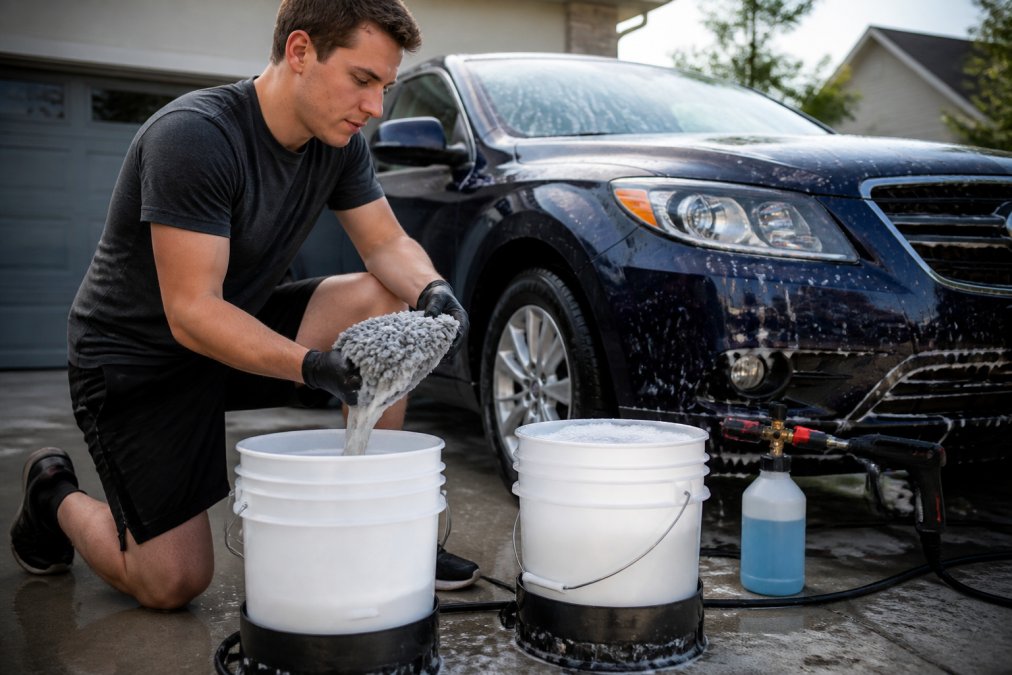
Your exterior arsenal starts with the two-bucket method setup: two 5-gallon buckets, a grit guard for each, and a quality microfiber wash mitt. The grit guard traps dirt particles at the bottom, preventing them from being reapplied to your paint during washing.
Invest in pH-balanced car wash soap, dish soap strips protective coatings and damages clear coat. A foam cannon attaches to your pressure washer and applies pre-wash foam across your vehicle, loosening surface contaminants before you touch the paint.
For paint decontamination, a clay bar removes embedded contaminants that washing alone cannot lift. These microscopic particles, brake dust, industrial fallout, tree sap, sit on your clear coat and feel rough to the touch.
Microfiber drying towels prevent water spots. Standard cotton towels trap minerals and leave streaks. For wheels and tires, use a dedicated wheel cleaner and separate brush, wheel brake dust contains metal particles that can damage paint if cross-contaminated.
Interior Detailing Supplies
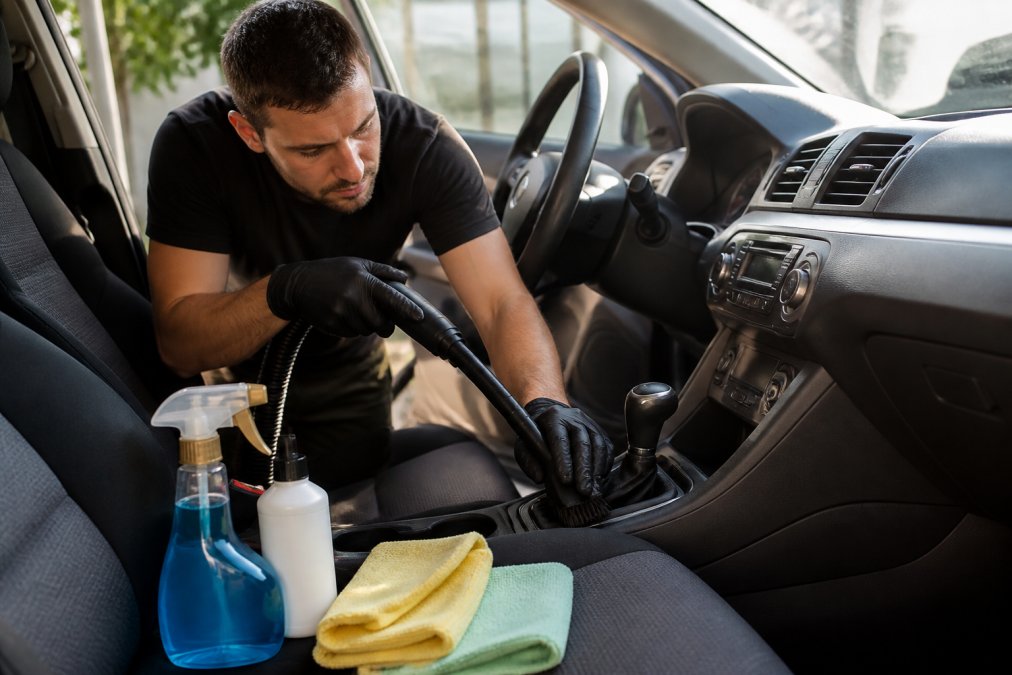
A quality shop vacuum with multiple attachment heads forms your foundation. The standard brush attachment handles carpet and seats, while a crevice tool reaches between seats and cup holders.
An upholstery cleaner works on fabric seats and carpets. All-purpose cleaners handle hard plastic surfaces, dashboards, and door panels. Automotive glass cleaner prevents streaking on windows. For leather seats, a dedicated leather conditioner maintains suppleness and prevents cracking. A detailing brush set with soft bristles cleans air vents and hard-to-reach areas.
Best Practices for Washing Your Car at Home
Washing your car correctly prevents damage that's difficult to reverse. Poor technique introduces swirl marks, fine scratches that catch light and make your paint look dull even when clean. The two-bucket method and foam cannon application address the root causes of these mistakes.
Pre-Wash and Foam Cannon Application
Start every wash with a pre-wash step. Attach your foam cannon to a pressure washer and apply foam across your entire vehicle from top to bottom. Let it sit for 3-5 minutes. This dwell time allows the foam to break down surface dirt and loosen contaminants. The foam suspends dirt particles away from your paint, so when you rinse, dirt flows away rather than dragging across your clear coat. This single step eliminates most swirl marks that occur during washing.
Two-Bucket Method and Paint Decontamination
Fill one bucket with soapy water and one with clean rinse water. The grit guard in each bucket is critical, it prevents dirt particles from being reapplied to your wash mitt. Dip your microfiber mitt in the soapy bucket, wash a small section using straight lines rather than circular motions, then rinse your mitt thoroughly in the clean water bucket. Work from top to bottom to prevent dirty water from dripping onto already-cleaned areas.
After washing, perform clay bar decontamination. Spray a section with detail spray, then glide your clay bar across the surface using light pressure. You'll feel the bar grab and smooth as it removes embedded contaminants. This step separates an average wash from one that reveals your paint's true condition.
Wheels, Tires, and Drying Techniques
Never use your vehicle's wash mitt on wheels. Brake dust contains metal particles and abrasive compounds (the CDC). Apply wheel cleaner and let it dwell for 2-3 minutes, then scrub with your wheel brush and rinse thoroughly.
For drying your entire vehicle, use microfiber drying towels exclusively. Work in straight lines from top to bottom, wringing out your towel frequently to maintain absorption. Some detailers use a leaf blower on cool setting to remove water from crevices before towel drying.
How Long Does It Take to Detail a Car
Most beginners spend 3-4 hours on their first detail, including washing, drying, interior vacuuming, and basic surface cleaning. Don't rush this timeline, hurrying introduces mistakes and careless technique.
As you develop technique, you'll work faster. Experienced detailers complete a full detail in 2-3 hours. The pre-wash step takes 15-20 minutes, the two-bucket wash method takes 45-60 minutes, drying takes 20-30 minutes, and interior work requires another 60-90 minutes. Breaking the job into sections, washing one day, interior detailing the next, prevents fatigue and ensures quality throughout.
Interior Detailing: Vacuuming and Surface Cleaning
Interior detailing reveals how much dirt accumulates inside your vehicle. A thorough interior cleaning makes your vehicle feel newer and protects upholstery from premature wear.
Vacuuming and Debris Removal
Start vacuuming before applying any liquids. Remove large debris by hand, then vacuum all carpeted areas, including under the seats and in the trunk. Use your shop vacuum's crevice tool to clean between seats, under seat rails, and along door sills, these areas trap dirt that regular vacuuming misses. Vacuum your seats thoroughly, working the brush attachment into fabric crevices. Don't forget the trunk.
Hard Surfaces, Glass, and Leather Care
After vacuuming, use all-purpose cleaner on your dashboard, steering wheel, door panels, and center console. Spray the cleaner on a microfiber cloth rather than directly on surfaces. Wipe in straight lines, not circular motions, to prevent streaks.
For air vents, use your detailing brush set. A soft-bristled brush removes dust without damaging the vent fins. For glass, use automotive glass cleaner and wipe in one direction to prevent streaks. If your vehicle has leather seats, apply leather conditioner after cleaning, leather is porous and absorbs moisture. Without conditioning, it dries out and cracks. Apply conditioner in circular motions, then buff with a clean microfiber cloth.
Common Mistakes to Avoid When Detailing Your Car
The biggest mistake beginners make is skipping the pre-wash foam step, moving straight to the two-bucket wash method. This introduces swirl marks that become visible once the vehicle dries.
Using the wrong soap ranks second. Dish soap and all-purpose cleaners strip protective coatings and damage clear coat. Always use pH-balanced car wash soap formulated for automotive use.
Circular washing motions cause swirl marks. Always use straight-line motions from top to bottom. Cross-contaminating your wash mitt with dirty water introduces swirl marks, rinse your mitt thoroughly between each section. Using standard cotton towels for drying leaves water spots and streaks. Microfiber is non-negotiable.
Forgetting to clean wheels separately leads to brake dust contamination. Always use dedicated wheel equipment. Neglecting interior vacuuming before applying cleaners causes mud, vacuum first, then clean.
Budget vs. Professional-Grade Tools: What You Actually Need
You don't need professional-grade equipment to achieve professional results. A budget microfiber wash mitt prevents swirl marks when used correctly. Both budget and professional foam cannons accomplish the goal of pre-washing your vehicle. Clay bars are relatively inexpensive regardless of brand, technique matters more than the product.
Microfiber drying towels show the biggest quality difference. Budget towels are thinner and absorb less water. Professional-grade towels are thicker, absorb more water, and last longer. This is one area where investing slightly more makes a noticeable difference.
Where budget tools genuinely struggle is durability. A budget shop vacuum motor may fail after 50 hours of use. A professional-grade unit lasts 500+ hours (peer-reviewed research). For occasional detailing, budget equipment is fine. For regular use, professional equipment is more economical long-term.
The Daily Drop by Ed Rivera helps you find quality tools at prices that make sense. Rather than forcing you toward premium brands, we curate options across different price points so you can match your budget to your actual needs.
Maintenance and Storage of Your Detailing Supplies
Proper storage extends tool life and ensures your supplies work correctly when you need them. Microfiber towels should be washed separately from regular laundry using cold water and no fabric softener. Air dry or use low heat. Store them in a clean, dry location in a plastic storage bin with a tight-fitting lid, away from direct sunlight.
Your wash mitt should be rinsed thoroughly after each use and air dried completely before storage. Store it in a mesh bag that allows air circulation. Never store a damp wash mitt in a sealed container.
Clay bars dry out if exposed to air. Store them in their original packaging or a sealed plastic bag in a cool location. Brushes should be rinsed and air dried after use, stored bristles-up to maintain their shape.
Your pressure washer should be drained after each use, especially before winter storage. Shop vacuum filters need cleaning after every 5-10 uses. Cleaning products should be stored in their original containers in a cool, dry location. Label everything with purchase dates, most automotive cleaners remain effective for 2-3 years if stored properly.
Detailing your car at home saves money and gives you control over the process. The techniques in this guide, the two-bucket method, foam cannon pre-washing, and proper drying, produce results comparable to professional detailing. Start with budget-friendly essentials from The Daily Drop by Ed Rivera, then upgrade specific tools as your skills develop. Focus on microfiber towels and a quality foam cannon first, these make the biggest difference in your results. Check back regularly for deals on detailing supplies as our inventory changes daily.
Frequently Asked Questions
What supplies do I need to start DIY car detailing as a beginner?
Start with the essentials: microfiber towels, pH-balanced car soap, two buckets with grit guards, a foam cannon or spray bottle, wheel cleaner, all-purpose cleaner for interior surfaces, glass cleaner, and a vacuum with brush attachments. You don't need expensive equipment at first, budget-friendly options work well for beginners learning proper technique.
How long does it typically take to detail a car from start to finish?
A basic DIY detail takes 2-4 hours for beginners, depending on your car's size and condition. Exterior washing and drying takes about 1-1.5 hours, while interior cleaning adds another 1-2.5 hours. As you gain experience and develop a system, you'll work faster. Professional detailers finish in 3-5 hours because they have optimized workflows and premium tools.
What are the most common detailing mistakes beginners make?
Beginners often skip the pre-wash step, use single-bucket washing (which reintroduces dirt), apply too much pressure when buffing, and forget to clean wheels before the body. They also use regular towels instead of microfiber, skip drying properly and create water spots, and overlook interior vacuuming before surface cleaning. These mistakes can cause swirl marks and reduce paint protection.
Can I detail my car without a foam cannon or special equipment?
Yes. Use a spray bottle to apply pH-balanced soap solution, then wash with the two-bucket method using microfiber wash mitts. A garden hose with adjustable nozzle works for rinsing. For drying, microfiber drying towels prevent water spots. You can clean interior surfaces with all-purpose cleaner and soft brushes. Budget-friendly alternatives work well, proper technique matters more than expensive gear.
This article was written using GrandRanker