

Table of Contents
- What You'll Need: Tools and Materials for Seat Cover Installation
- Preparation: Remove Headrests and Inspect Your Seats
- How to Install Seat Covers Step by Step
- How to Secure Seat Covers to Prevent Sliding
- How Long Does It Take to Install Seat Covers
- Common Installation Mistakes to Avoid
- Safety Considerations: Airbags and Vehicle-Specific Configurations
- Conclusion
Last Updated: August 27, 2026
What You'll Need: Tools and Materials for Seat Cover Installation
Installing seat covers properly requires specific tools and materials to ensure a secure, wrinkle-free fit that protects your vehicle's upholstery without damaging safety systems.
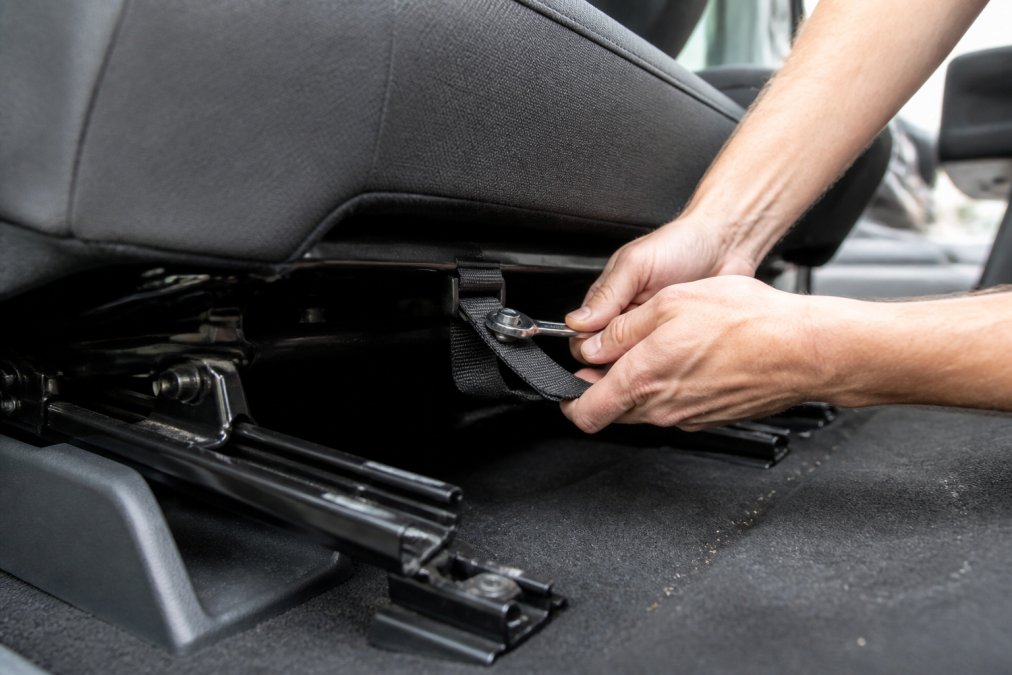
Start with basics: a flathead screwdriver for removing headrests, a Phillips head screwdriver for fasteners, and a socket wrench set for seat track bolts. A plastic trim removal tool prevents scratches when prying panels, and a utility knife trims excess fabric at seams. Gather elastic straps, hooks, and fasteners that come with quality seat covers, or purchase automotive-grade anchoring hardware for your vehicle model. A tension wrench or ratchet strap achieves proper post-installation tightening, critical for preventing sliding. A flashlight helps secure straps beneath the seat base, a heat gun (low setting) helps fabric conform to contours, and a lint roller cleans the seat surface before installation.
The Daily Drop by Ed Rivera carries a curated selection of automotive installation tools and accessories, making it easy to find everything you need without overpaying. Check back regularly, as inventory changes daily with new deals on tools that make this project manageable for DIY installers.
Preparation: Remove Headrests and Inspect Your Seats
Proper preparation determines whether your seat covers fit correctly and stay secure. This phase involves safely removing headrests and conducting a critical safety inspection for airbag systems that could be compromised by improper installation.
Detach the headrests safely
Most vehicle headrests pull straight up with firm, even pressure. Locate the small button or release lever on the side of the headrest post, then pull upward while applying steady force. Some vehicles feature headrests that require a screwdriver to release a locking pin, check your owner's manual for your model's specific mechanism. Once removed, set headrests aside safely and keep any small pins or fasteners in a labeled container for correct reattachment. Never force a stuck headrest, as this damages the post and seat frame.
Check for side-impact airbags and safety sensors
This is the most critical step many DIY installers skip. Side-impact airbags are integrated into seat structures in modern vehicles, and improper seat cover installation can interfere with deployment (nhtsa.gov). Locate your vehicle's airbag warning labels, typically on seat sides or in your owner's manual.
Examine the seat for electronic sensors, wiring, or foam structures that differ from standard cushioning. These components detect impact and trigger airbag deployment. Installing seat covers that restrict movement or add excessive bulk around these areas creates a safety hazard. Check your vehicle's documentation for airbag locations specific to your year, make, and model. If uncertain about airbag placement, contact your vehicle manufacturer or a certified mechanic before proceeding.
How to Install Seat Covers Step by Step
Proper installation requires a methodical approach that respects your vehicle's contours and safety systems.
Step 1: Position the backrest cover and align seams
Drape the backrest cover over the seat back, ensuring it hangs evenly on both sides. Seams should align with the natural edges of the backrest, not stretch across the center. Check that openings for headrest posts align correctly with the cover's designated slots. Adjust the cover until the fit feels balanced, then secure the top edge temporarily with your hands while working on lower sections.
Step 2: Secure elastic straps and buckles underneath
Move to the underside of the seat and locate the elastic straps and buckles. Pull straps taut but not excessively tight, over-tensioning stresses fabric and creates uneven pressure. Thread each strap through its designated slot, then secure it to the appropriate anchor point using provided buckles or hooks. Work methodically from one side to the other, maintaining even tension across all straps to prevent diagonal pulls that distort the cover.
Step 3: Tuck fabric into crevices and contours
Car seats feature numerous crevices where the backrest meets the base, where armrests attach, and where the seat meets the floor. Use your fingers to gently work fabric into these contours, starting from the center and working outward. For tight spaces, a plastic trim tool helps without damaging fabric. Pay special attention to seams where different cover sections meet, as these areas are prone to gaps if not properly aligned.
Step 4: Install the cushion cover and anchor it
Place the cushion cover over the seat base, ensuring it aligns with the seat's edges on all sides. Locate anchor points underneath the seat base and secure the cover using provided fasteners, working from the center outward to maintain even tension. The fit should feel snug but not constrictive. Check that the cover sits flush with no bunching or excessive fabric.
Step 5: Attach rear seat covers and adjust for fitment
Apply covers to rear seats using the same methodology as front seats. After all covers are installed, perform a fitment check by sitting on the seat and applying moderate pressure to ensure the cover doesn't shift. Gently pull the fabric in various directions to confirm secure attachment. Any sliding or movement indicates that tension adjustment is needed.
How to Secure Seat Covers to Prevent Sliding
A properly installed seat cover should remain secure through regular use, highway driving, and temperature fluctuations.
Tension adjustment and post-installation tightening
Immediately after installation, check all fasteners and elastic straps for proper tightness. Seat covers require periodic re-tensioning as fabric naturally settles and materials adjust to vehicle interior temperatures. Use a tension wrench or ratchet strap to apply consistent pressure to each fastening point, snug enough to prevent movement but not so tight that you risk tearing fabric or stressing seams. You should not be able to pull the cover more than a quarter-inch in any direction.
Check tension weekly for the first month after installation. Temperature changes, humidity shifts, and normal vehicle use cause fabric to relax slightly. Periodic re-tightening during this break-in period prevents sliding problems.
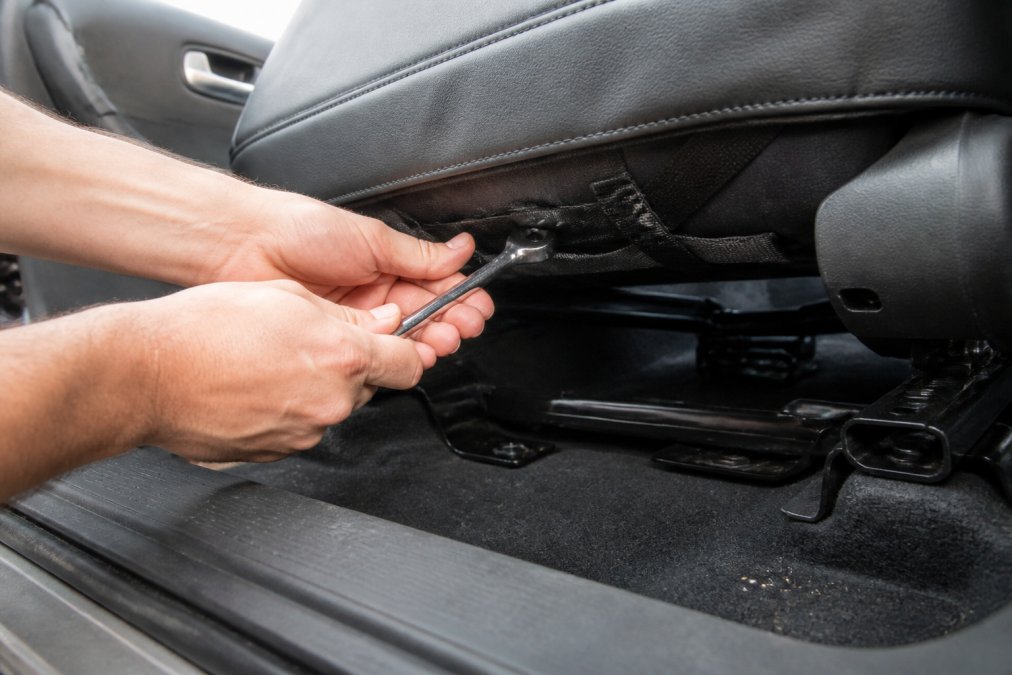
Using hooks and fasteners for a wrinkle-free fit
Quality seat covers include multiple hook and fastener options designed for your vehicle's specific seat structure. Hooks attach to existing frame elements, while fasteners secure through bolt holes or slots. Use each fastener according to its design purpose, hooks work best for edges and transitions, while fasteners provide superior security for high-stress areas like the cushion base.
Wrinkles develop when fasteners are unevenly distributed or tension varies across the cover. Distribute fasteners evenly across the entire surface, spacing them consistently. After tightening all fasteners, visually inspect the entire cover for wrinkles or gaps and smooth any creases by hand.
How Long Does It Take to Install Seat Covers
Installation time varies based on your vehicle's seat configuration, cover complexity, and experience level. Most front-seat installations take 30-90 minutes for first-time installers; experienced installers complete the same work in 15-30 minutes (nhtsa.gov). Rear seats typically add 20-45 minutes. The preparation phase adds 10-15 minutes but is non-negotiable for safety. Complex vehicles with integrated armrests or unusual cushion shapes extend installation time considerably. Budget extra time if working alone or in confined spaces, proper installation cannot be rushed.
Common Installation Mistakes to Avoid
The most common error is inadequate tensioning. Installers achieve initial tightness but fail to re-check fasteners after the cover settles. Within days, the cover begins sliding. Prevent this by scheduling tension checks at one week, one month, and three months after installation.
Misalignment of seams creates visible gaps and uneven coverage. Take time to adjust positioning before tightening any fasteners. Forcing fabric into contours causes tears and seam separation, if fabric doesn't fit smoothly, reassess the cover position rather than applying force. Ignoring airbag and sensor locations creates genuine safety hazards. Always verify airbag locations before proceeding. Choosing universal covers for vehicles with custom seat configurations leads to poor fitment, custom-fit covers deliver superior results on specialty vehicles.
Safety Considerations: Airbags and Vehicle-Specific Configurations
Seat cover installation intersects directly with your vehicle's safety systems. Side-impact airbags deploy from integrated chambers within seat structures and require unobstructed movement to function correctly. Seat covers that add excessive bulk or restrict movement interfere with deployment. Before installation, identify airbag locations in your specific vehicle model and ensure your cover design accommodates them.
Some vehicles feature occupancy sensors that detect whether seats are occupied and adjust airbag deployment force accordingly (nhtsa.gov). Thick or heavily padded seat covers can confuse these sensors, potentially causing deployment malfunctions. Seat-integrated heating and cooling systems require covers with appropriate ventilation, covers that completely seal these systems prevent function and can damage heating elements. Many quality covers include perforations designed to maintain system functionality.
Vehicle-specific configurations vary dramatically. Vehicles with power seat adjustments, integrated lumbar support, or multiple adjustment levers require covers designed for those features. Contact your vehicle manufacturer or a certified installer if uncertain whether your chosen covers are compatible with your vehicle's safety systems and seat configuration.
Installing seat covers properly protects your vehicle's interior while maintaining cabin aesthetics. The process demands attention to detail, proper tool selection, and respect for your vehicle's safety systems. At The Daily Drop by Ed Rivera, we understand that quality automotive accessories don't require premium pricing, we help you find the tools and materials you need to complete this project correctly without overspending. Check our inventory regularly for installation tools, fasteners, and seat cover options that deliver real value for your automotive maintenance needs.
Frequently Asked Questions
Q: Can I install seat covers without removing the seats?
A: Yes. Most seat covers install directly over your existing upholstery without seat removal. You'll detach headrests and work the fabric around the backrest, cushion, and base. Removing headrests takes a few minutes and makes alignment easier. For rear seat covers, the process is similar, no seat removal needed. Covers are designed to work with your vehicle's existing configuration.
Q: What tools do I need to install seat covers?
A: Basic tools needed for car seat cover installation include a flathead screwdriver (for headrest removal), a trim tool or plastic wedge (for tight spaces), scissors, and a rubber mallet (optional, for stubborn fasteners). Most installations require only these simple tools.
Q: How do I keep my seat covers from sliding?
A: Secure seat covers to prevent sliding by using elastic straps and hooks provided with your covers. Anchor these to the seat base and tracks underneath. Adjust tension after installation so fabric is snug but not overstretched. Check that buckles are fully fastened and fasteners are gripping the seat frame. Tuck fabric deeply into seams and contours for extra grip.
Q: How long does it take to install seat covers?
A: Most front seat covers install in 20-45 minutes per seat, depending on fitment complexity. Rear seat covers typically take 30-60 minutes. First-time installations often take longer as you learn your vehicle's specific configuration. Once familiar with the process, subsequent installations are faster.
This article was written using GrandRanker