

Table of Contents
- What Are DIY Automotive Upgrades for Beginners?
- Essential Tools and Safety Gear You'll Need
- Easy Car Mods for Beginners: Interior & Lighting
- Simple Car Performance Upgrades You Can Install
- Beginner-Friendly Car Maintenance as an Upgrade
- Cost-Effective Car Mods for Beginners on a Budget
- Legal, Insurance, and Safety Considerations
- Common Mistakes Beginners Make When Upgrading Cars
Last Updated: July 20, 2026
What Are DIY Automotive Upgrades for Beginners?
DIY automotive upgrades for beginners represent the most accessible entry point into vehicle customization, allowing car owners to enhance their rides without professional installation costs. These upgrades fall into several categories: aesthetic improvements, performance enhancements, comfort modifications, and maintenance upgrades. What separates beginner-friendly modifications from advanced ones is the combination of installation difficulty, required tools, and potential for reversibility. The real appeal is that they build your confidence and teach you how your vehicle works before investing in more complex projects.
Essential Tools and Safety Gear You'll Need
Before tackling any diy automotive upgrades for beginners, you need the right tools and safety equipment. Start with a basic hand tool set that includes sockets (metric and standard), wrenches, screwdrivers (Phillips and flathead), and pliers. A torque wrench becomes essential once you're working with fasteners that require specific tightness specifications. Trim removal tools are specialized but inexpensive, preventing you from cracking plastic panels during interior work.
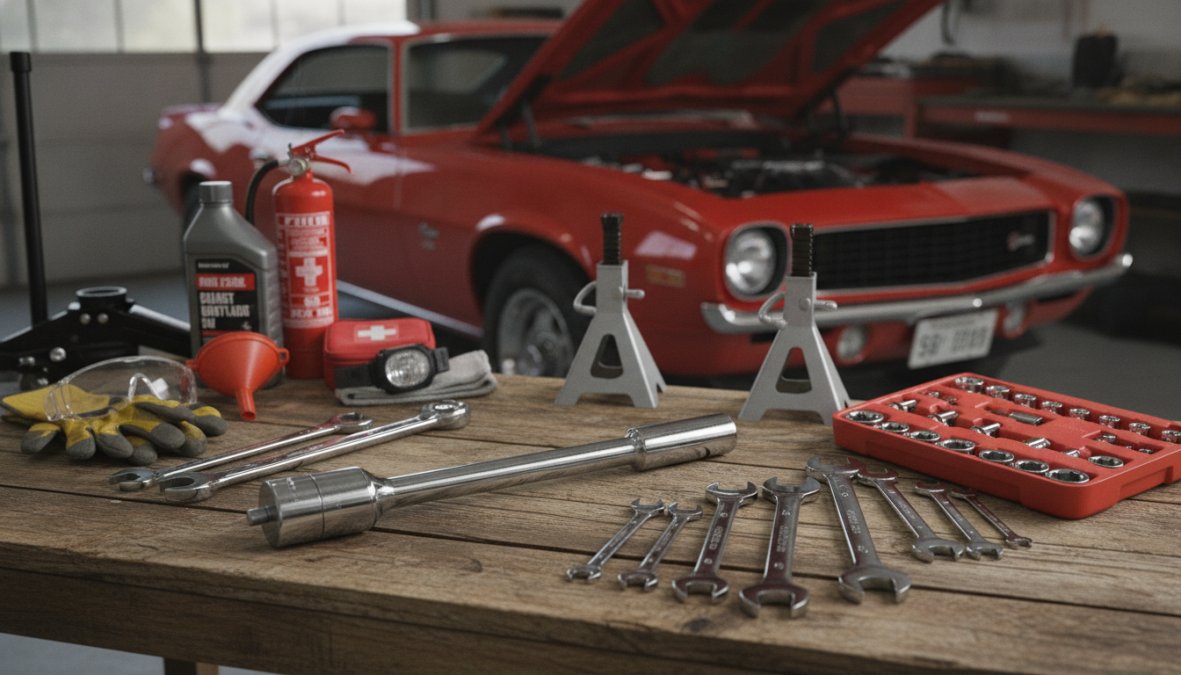
Safety gear is non-negotiable: safety glasses, work gloves, a jack and jack stands (never rely solely on a jack), and a flashlight or headlamp. Additional helpful items include a socket organizer, a creeper for working under the car, and shop towels.
Tool-Specific Starter Kits for First-Time Installers
Rather than buying individual tools, many beginners benefit from starter kits designed specifically for automotive work. A basic socket set with 3/8-inch drive handles both standard and metric sizes effectively. Screwdriver kits with interchangeable bits work better than fixed-blade screwdrivers for automotive work, handling Phillips, flathead, Torx, and square-drive fasteners. Trim removal tool kits specifically designed for automotive interiors prevent expensive panel damage. The investment in quality starter kits pays dividends in both safety and confidence.
Easy Car Mods for Beginners: Interior & Lighting
Interior and lighting modifications represent the safest entry point into diy automotive upgrades for beginners because they rarely affect mechanical systems or void warranties. Interior upgrades include phone mounts, interior LED kits, all-weather floor mats, and steering wheel covers, modifications that take 15 minutes to an hour and require minimal tools. Lighting upgrades extend to headlight restoration and window tinting, which require slightly more skill but remain manageable for beginners.
Interior LED Kits and Phone Mounts
Interior LED kits replace factory dome lights, map lights, and trunk lights with bright LED bulbs. Installation requires removing the factory bulb and inserting the LED replacement, taking 20-30 minutes with no tools required. The reversibility is complete, and you can reinstall factory bulbs anytime.
Phone mounts keep your phone visible for navigation without holding it. Installation involves cleaning the surface, positioning the mount, and letting adhesive cure for 24 hours. This single upgrade improves daily usability more than many more complex modifications.
Window Tinting and Aesthetic Upgrades
Window tinting darkens your windows, reduces interior heat and UV damage, and gives your car a more aggressive appearance. Beginner-friendly tinting films let you do it yourself by cleaning windows, measuring and cutting the film, and applying it with a squeegee and soapy water solution. The reversibility is absolute, you can remove film and start over without permanent damage.
Plastidip is a spray-on coating that transforms plastic trim pieces. Factory black plastic trim fades to chalky gray over time. Plastidip restores that look in different finishes: matte, satin, or gloss. If you dislike the result, Plastidip peels off completely. Carbon fiber vinyl wraps work similarly on trim pieces, spoilers, or panels, delivering dramatic aesthetic changes with guaranteed reversibility.
Simple Car Performance Upgrades You Can Install
Performance upgrades aim to increase horsepower, torque, or efficiency. A cold air intake replaces your factory air filter and intake system with a less restrictive design, allowing more air to reach the engine and resulting in modest horsepower gains (typically 5-15 HP depending on your vehicle). Installation requires removing factory intake components and bolting on the new system, a 1-2 hour job requiring basic hand tools.
An air filter replacement is even simpler. Your factory air filter restricts airflow by design. A performance air filter with less restrictive media improves airflow with minimal effort, taking 10 minutes and requiring no tools. Synthetic oil is a maintenance upgrade that improves performance by reducing engine wear, improving fuel economy slightly, and extending oil change intervals. The installation process is identical to conventional oil changes.
Cold Air Intake and Air Filter Replacement
A cold air intake system draws cooler air from outside the engine bay rather than using warm air from the engine compartment. Cooler air is denser, containing more oxygen molecules per volume. Your engine's computer automatically adjusts fuel injection for this additional oxygen, creating a slightly richer mixture that burns more completely.
Installation is straightforward: remove the factory air box and intake piping, position the new intake manifold and secure it with provided bolts, connect the mass airflow sensor to the new filter housing, and reattach any hoses and clamps. The entire process takes 1-2 hours depending on your vehicle's engine bay layout. Benefits extend beyond horsepower, a performance intake produces a more aggressive induction sound during acceleration.
Synthetic Oil and Maintenance Upgrades
Switching to synthetic oil is perhaps the most impactful maintenance upgrade available. Synthetic oil molecules are uniform in size and structure, providing superior lubrication and protection compared to irregular molecules in mineral oil. Benefits include reduced engine wear, improved cold-start performance, better high-temperature stability, and extended oil change intervals (7,500-10,000 miles compared to 3,000-5,000 miles for conventional oil).
Installation is identical to conventional oil changes: warm the engine slightly, locate and remove the drain plug, let the oil drain completely, replace the drain plug, locate and replace the oil filter, and add the recommended amount of synthetic oil. The cost difference is modest, typically $5-15 per quart, and the extended intervals justify the additional investment.
Beginner-Friendly Car Maintenance as an Upgrade
Maintenance modifications are among the most valuable diy automotive upgrades for beginners. Tire rotation prevents uneven wear patterns by equalizing wear across all four tires, extending tire life significantly. The process involves removing all four wheels, moving them to different positions, and reinstalling them, taking 30-45 minutes with basic tools.
Air filter replacement keeps your engine breathing properly. A clogged filter restricts airflow, reducing efficiency and engine performance. Replacement takes 10 minutes and requires no special tools. Brake fluid inspection and replacement is critical, brake fluid absorbs moisture from the air over time, reducing its effectiveness. Flushing and replacing brake fluid every 2-3 years is essential maintenance.
Tire Rotation, Filter Changes, and Detailing
Tire rotation prevents uneven wear patterns that compromise safety and tire lifespan. For front-wheel drive vehicles, move front tires to the rear and rear tires to the front, crossing them diagonally. This pattern ensures even wear and maximum tire life.
Detailing is maintenance that protects your investment. Regular washing removes contaminants that damage paint. Waxing provides UV protection and makes water bead off the surface. Interior vacuuming and cleaning prevent staining and odors. Headlight restoration removes oxidation from plastic headlight lenses by sanding with progressively finer sandpaper, applying a clear coat, and polishing. The transformation is dramatic, and visibility improves significantly, taking 30-60 minutes per headlight.
Cost-Effective Car Mods for Beginners on a Budget
Budget constraints don't mean you can't upgrade your vehicle. All-weather floor mats cost $30-60 and protect your carpets. A phone mount costs $15-30 and improves daily usability. An interior LED kit costs $20-50 and transforms your cabin lighting. A steering wheel cover costs $15-25 and adds grip and personalization. These four modifications total under $150 and completely change how your vehicle looks and feels.
Window tinting film costs $30-80 for a DIY kit and dramatically alters your car's appearance. Plastidip costs $20-40 per can and refreshes faded trim pieces. An air filter replacement costs $15-30 and improves performance. The key to budget modifications is prioritizing what matters most to you: aesthetic upgrades if you want your car to look better, comfort and performance modifications if you want it to feel better, or maintenance upgrades if you want it to last longer.
Reversible Modifications and Warranty Protection
Reversibility is critical for beginners because it eliminates the fear of permanent mistakes. Most beginner-friendly modifications are completely reversible: adhesive-based modifications like phone mounts and interior LED panels can be removed and reinstalled without permanent damage. Plastidip and vinyl wraps peel off completely. Window tinting can be removed with heat and careful scraping.
Warranty protection is more complex. Modifications that don't affect mechanical systems rarely void warranties. Interior LED kits, phone mounts, and floor mats have no impact on warranty coverage. Performance modifications like cold air intakes and synthetic oil are riskier, some manufacturers claim they void warranty coverage, though this claim is often unenforceable under consumer protection laws. Research your vehicle's warranty terms before installing performance modifications and document that any performance issues existed before your modifications.
Legal, Insurance, and Safety Considerations
Before installing any diy automotive upgrades for beginners, understand the legal and insurance implications. Window tinting is regulated by state law. Most states allow rear and side window tinting but restrict front windshield tinting to a narrow band at the top. Check your state's specific regulations before tinting.
Emissions modifications are heavily regulated. Cold air intakes and performance exhausts that remove catalytic converters are illegal in most states. Avoid modifications that tamper with oxygen sensors, fuel injection, or catalytic converters. Insurance coverage is important, most standard policies cover modifications without issue, but performance modifications that significantly increase horsepower might require disclosure. Contact your insurance agent before installing major modifications.
Safety modifications deserve emphasis. Anything that affects braking, steering, or suspension requires professional installation. Beginners should avoid these systems entirely. Lighting modifications are safe. Aesthetic modifications are safe. Maintenance upgrades are safe. Performance modifications that don't affect critical systems are generally safe.
Common Mistakes Beginners Make When Upgrading Cars
The biggest mistake is underestimating the importance of proper preparation. Rushing to install a modification without reading instructions or watching tutorial videos leads to frustration and mistakes. Spend 15 minutes reading instructions before starting and watch a video walkthrough on YouTube.
Ignoring torque specifications is another frequent error. Bolts require specific tightness levels. Over-tightening strips threads and breaks fasteners. Under-tightening causes components to loosen and fail. A torque wrench costs $30-50 and prevents this mistake entirely. Skipping safety steps is dangerous, using a jack without stands, not wearing safety glasses, or working under a running engine causes injuries. Never skip safety steps.
Choosing poor-quality parts wastes money. Research product reviews before purchasing. Another common mistake is installing modifications that don't match your vehicle's aesthetic or performance goals. Before installing anything, ask yourself: Will this make my car look or perform better? Will I still like this in six months? Finally, beginners often skip documentation. Take photos before starting work, document the installation process, and keep receipts for parts and tools.
Getting started with diy automotive upgrades for beginners doesn't require expensive tools, advanced mechanical knowledge, or years of experience. It requires a willingness to learn, respect for safety, and honest assessment of your skill level. Start with simple aesthetic or maintenance upgrades to build confidence, then progress to more complex modifications as your skills develop. Your vehicle will look and feel better, and you'll discover a rewarding hobby that deepens your connection to your car.
Frequently Asked Questions
What are some easy car mods for beginners with no experience?
Easy car mods for beginners include interior LED kits, phone mounts, all-weather floor mats, and window tinting, all requiring minimal tools and no mechanical knowledge. Simple performance upgrades like air filter replacement and tire rotation are also beginner-friendly. These modifications take 30 minutes to 2 hours and don't require specialized equipment. Interior aesthetic upgrades like steering wheel covers and wireless chargers are plug-and-play options that add comfort without any installation complexity.
Do DIY automotive upgrades void your car's warranty?
Some modifications can void warranty coverage, but not all. Reversible modifications like phone mounts and interior LED kits typically don't affect warranty. However, performance upgrades like cold air intakes or exhaust modifications may void engine-related coverage depending on your manufacturer. Check your warranty terms before installing any aftermarket parts. Document your work and keep receipts. Many dealers distinguish between dealer-installed maintenance and aftermarket performance parts, so basic maintenance upgrades are usually safe.
What tools do beginners actually need for DIY car modifications?
A basic tool-specific starter kit includes a socket set, adjustable wrench, screwdrivers (Phillips and flat-head), trim removal tools, and a jack with jack stands for safety. For interior upgrades, you'll need a panel removal tool and possibly a heat gun for vinyl work. Most beginner mods don't require specialty automotive tools. A quality socket set covers 80% of common installations. Invest in a reliable toolkit rather than buying individual tools, this saves money and ensures compatibility across projects.
How long does it take to install simple car performance upgrades?
Simple upgrades vary in installation time. Air filter replacement takes 15-30 minutes, tire rotation requires 1-2 hours, and synthetic oil changes take 45 minutes to 1 hour. Interior modifications like LED kits and phone mounts install in 30-60 minutes. Window tinting is more involved, typically 2-4 hours depending on your vehicle. Cold air intake installation takes 1-2 hours for most vehicles. Always consult your vehicle's manual and watch installation guides specific to your car model before starting any project.
This article was written using GrandRanker