

Table of Contents
- Easy DIY Smart Home Security Setups: What You Need to Know
- DIY Home Security System Installation: Step-by-Step Setup
- Smart Home Security Devices: Core Components Explained
- Affordable Smart Home Security Solutions: No-Contract Options
Last Updated: July 29, 2026
Easy DIY Smart Home Security Setups: What You Need to Know
DIY smart home security offers real protection without expensive professional contracts. Modern wireless systems eliminate drilling, rewiring, and installation fees, what once required professionals now takes an afternoon and basic tools most people already own. This guide walks you through evaluating your home's needs, understanding key devices, comparing options, and getting your system running in hours.
DIY Home Security System Installation: Step-by-Step Setup
Setting up a DIY home security system is straightforward: unbox equipment, download the app, create your account, add sensors, test everything, and customize settings.
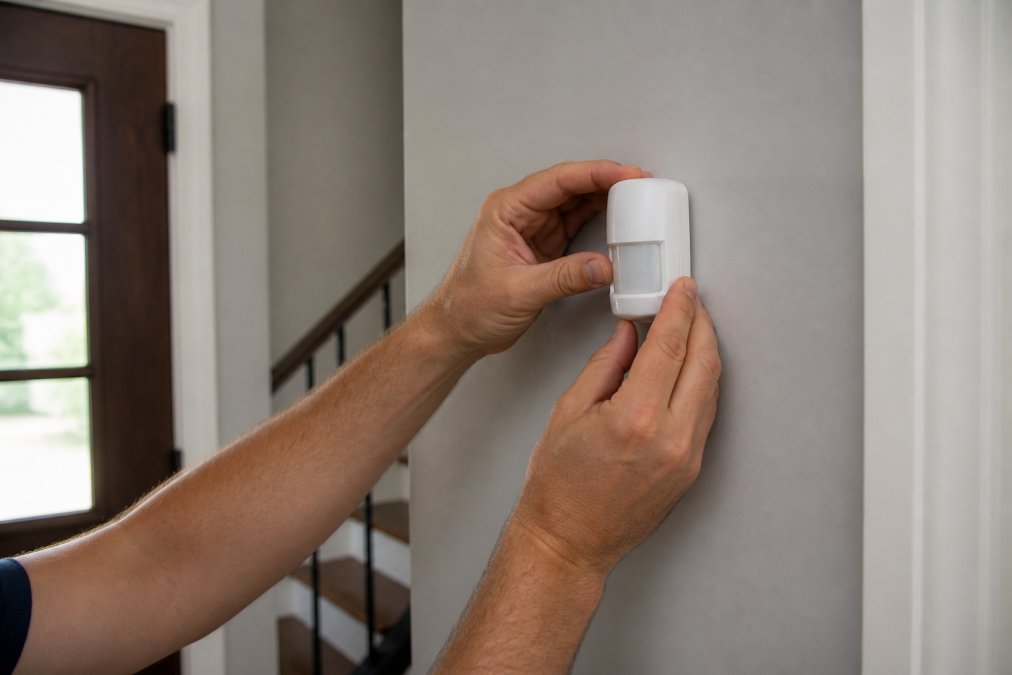
Place your hub in a central location near the center of your home, away from metal objects or appliances that interfere with wireless signals. Install door and window sensors on frames and doors using adhesive strips or small screws, when the door opens, the magnetic connection breaks and triggers an alert. Mount motion sensors in corners or high-traffic areas where intruders would likely pass, keeping them away from direct sunlight and heating vents to prevent false alarms. Test your entire system by triggering each sensor and verifying alerts appear on your phone. Most people complete this process in two to three hours.
| Setup Step | Time Required | Difficulty | Tools Needed |
|---|---|---|---|
| Hub placement and power-up | 10 minutes | Very Easy | None |
| Door/window sensor installation | 20-30 minutes | Easy | Screwdriver or adhesive strips |
| Motion sensor mounting | 15-20 minutes | Easy | Screwdriver or adhesive strips |
| App setup and pairing | 20-30 minutes | Easy | Smartphone |
| System testing and configuration | 15-20 minutes | Easy | Smartphone |
Smart Home Security Devices: Core Components Explained
A functional DIY system requires several core components. The hub is the brain of your system, receiving signals from all sensors and sending notifications to your phone. Door and window sensors detect openings using a magnetic connection between two plastic pieces, triggering alerts when separated. Motion sensors use passive infrared technology to sense heat signatures and send alerts when movement is detected. Video doorbells let you see who's at your door and speak to visitors through two-way audio. Smart locks let you lock or unlock remotely and integrate with your security system. Sirens produce loud alarms (usually 110+ decibels) that deter intruders and alert neighbors.
How to Choose a DIY Security System
Count your entry points, most homes have 2-4 main doors and 4-8 windows needing sensors. Decide between self-monitoring (you receive alerts and decide whether to call police) and professional monitoring (a company receives alerts and contacts authorities). Self-monitoring costs nothing extra but requires your availability; professional monitoring adds $10-30 monthly but provides 24/7 response.
Consider your home's Wi-Fi strength and whether your system offers cellular backup. If you use Alexa, Google Home, or Apple HomeKit, choose a system that integrates with your ecosystem. Finally, compare the mobile app experience before committing, you'll be checking alerts and arming/disarming constantly.
Professional Monitoring vs. Self-Monitoring
With self-monitoring, you receive all alerts directly on your phone and decide whether to contact police. This costs nothing extra but requires your availability. With professional monitoring, a security company's dispatch center receives your alerts 24/7 and contacts you to verify emergencies before calling police, typically costing $10-30 monthly.
Many modern systems offer both options simultaneously, providing redundancy if you miss an alert. Consider your lifestyle: if you travel frequently or work long hours, professional monitoring makes sense. If you're home most of the time, self-monitoring is sufficient.
Affordable Smart Home Security Solutions: No-Contract Options
The biggest advantage of DIY systems is avoiding long-term contracts. Traditional alarm companies lock you into 2-3 year agreements with early termination fees. DIY systems let you pay month-to-month or not at all.
A basic starter kit with hub and 2-3 sensors typically costs $200-400, with optional monitoring at $10-30 monthly. Look for systems that let you add sensors gradually rather than buying complete packages with unnecessary equipment. Some systems offer free professional monitoring for the first month, letting you try it risk-free before committing.
Key Features to Look For in DIY Security Systems
Wireless connectivity using Z-Wave, Zigbee, or proprietary 2.4GHz Wi-Fi is non-negotiable. Cellular backup protects you if your internet goes down. Battery backup for the hub ensures operation during power outages, typically lasting 24-48 hours. Mobile app quality determines whether you'll actually use the system, it should load quickly, send notifications instantly, and let you arm/disarm with one tap. Smart home integration with Alexa, Google Home, or Apple HomeKit adds convenience. Cloud storage for video lets you review footage after incidents. Field of view for cameras matters significantly, 180-degree wide-angle views cover more area than 90-degree views. Night vision capability ensures you can see footage in darkness.
Smart Home Integration and Compatibility
Modern security systems increasingly integrate with broader smart home ecosystems. If you use Amazon Alexa, look for systems with native compatibility so you can voice-control your security system and enable automation routines. Check compatibility before buying, some systems work with all three platforms; others support only one or two. Smart locks deserve special attention, as compatible locks can automatically unlock when you disarm your system or lock when you arm it.
Rental-Friendly Installation Guides
Renting presents unique security challenges since you can't make permanent modifications. Modern DIY systems are designed with renters in mind. Adhesive mounting using 3M strips holds securely but leaves no damage when removed. Wireless hubs can sit on shelves with zero installation impact. Video doorbells with batteries mount with adhesive or a small bracket and require no wiring. Smart locks for renters should be temporary, with removable options that fit over existing deadbolts without modification. Review your lease before installing anything, most landlords allow battery-powered security devices that don't damage walls.
Troubleshooting Common DIY Setup Issues
Sensors not pairing: Check that your hub is powered on and connected to Wi-Fi. Restart both devices and ensure you're in pairing mode. Move the sensor closer to the hub if distance prevents connection.
False alarms from motion sensors: Reposition sensors away from windows (shadows trigger false alarms) and heating vents (warm air triggers false alarms), or lower the sensitivity setting.
Weak Wi-Fi signal: Move your hub closer to your router or add a Wi-Fi extender. If your hub supports cellular backup, enable it for redundancy.
Notifications not arriving: Check your phone's app notification permissions and ensure the security app has permission to send notifications.
Battery drain on wireless sensors: Check for a sensor stuck in an open position. Replace batteries if they're over a year old.
Protecting your home shouldn't require expensive contracts or professional installation crews. Easy DIY smart home security setups have democratized home security, making it accessible to renters, budget-conscious homeowners, and anyone tired of hidden fees. Start with a wireless hub and a few door sensors, test the system, and expand as your needs grow.
Frequently Asked Questions
What is the easiest DIY smart home security setup for beginners?
The easiest DIY smart home security setups use wireless, battery-powered sensors that require no drilling or professional installation. Look for systems with drill-free installation options, pre-paired components, and intuitive mobile app control. Wireless motion sensors, door/window sensors, and video doorbells can typically be installed in under an hour. Choose systems that offer cloud storage and local storage options, and prioritize those with strong Wi-Fi connectivity and cellular backup for reliability. Most modern DIY systems come with clear setup guides and customer support.
Can I monitor a DIY home security system without paying monthly subscription fees?
Yes. Many no-contract home security systems offer self-monitoring options where you receive alerts directly to your mobile app without paying professional monitoring fees. You monitor your own video doorbell feeds, motion sensors, and security cameras through the app. However, some systems require subscriptions for cloud storage, two-way audio features, or advanced notifications. Compare subscription plans carefully, some affordable smart home security solutions offer optional monitoring, meaning you can add it later if needed. Check whether local storage is available as an alternative to cloud storage.
How do I ensure privacy and data security with my DIY smart home security system?
Verify that your chosen system uses end-to-end encryption for video feeds and sensor data. Check the manufacturer's privacy policy to understand how data is stored and who can access it. Prefer systems offering local storage options alongside cloud storage, giving you control over sensitive footage. Enable two-factor authentication on your mobile app account. Review field of view settings on cameras to avoid recording neighbors' properties. Research the company's data retention policies and ensure they comply with US privacy standards. Regularly update device firmware and change default passwords on keypads and smart locks.
What should I do if my DIY smart home security devices aren't connecting properly?
First, verify all devices are within range of your Wi-Fi router and that your network has sufficient bandwidth. Restart your router and the affected device by removing batteries for 30 seconds, then reinserting them. Check that your mobile app is updated to the latest version. If motion sensors or door/window sensors aren't triggering alerts, ensure they're properly positioned and not blocked by obstacles. For video doorbell and camera issues, confirm your internet speed meets minimum requirements (typically 2-5 Mbps per camera). If problems persist, reset the device to factory settings and re-pair it with your system following the manufacturer's troubleshooting guide.
This article was written using GrandRanker